Different Brake Types and Working Principles
Mechanical Disc Brakes: Mechanical disc brakes use a brake cable to connect the lever and caliper. Pulling the lever tightens the cable, pressing the brake pads against the rotor to slow the bike.
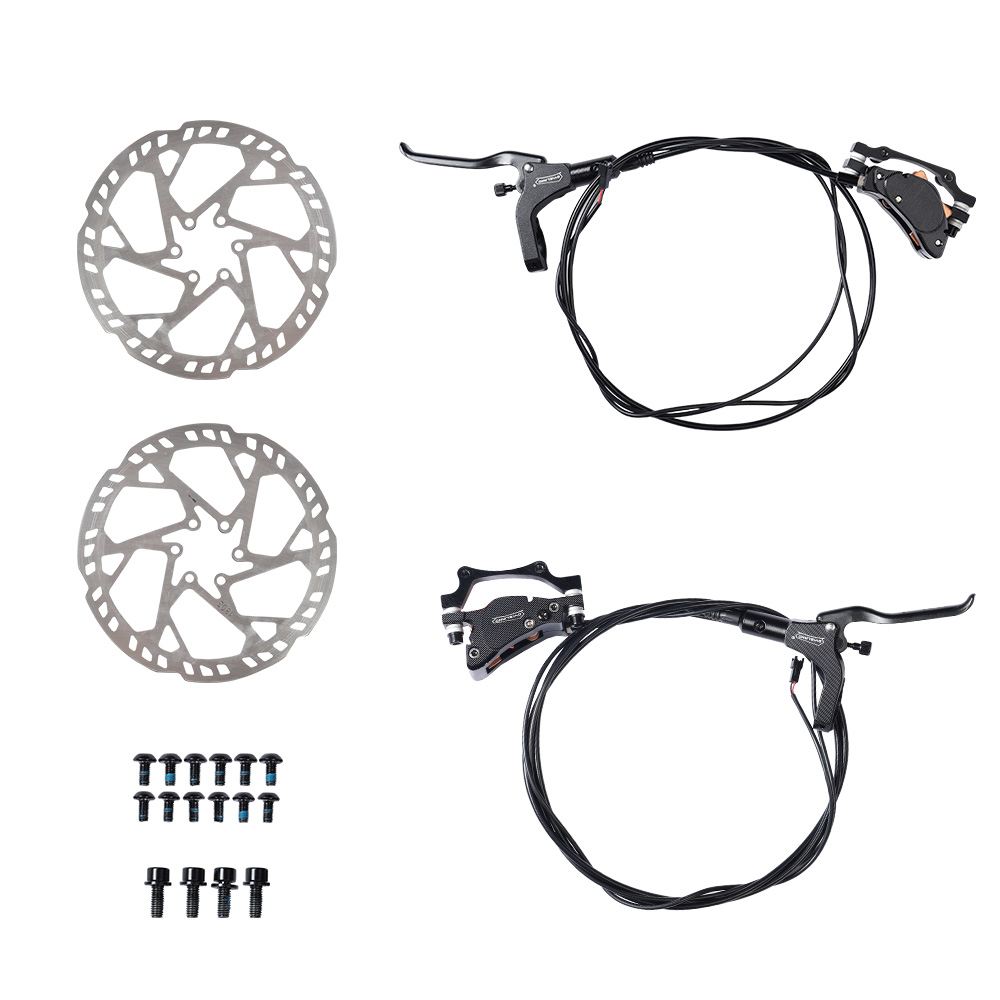
Hydraulic Disc Brakes: Hydraulic disc brakes are typically found on higher-end e-bikes, especially those designed for off-road, mountain, or long-distance riding. These brakes offer superior stopping power and stability, which makes them ideal for riders who tackle challenging terrain, steep descents, or need high performance for long trips. They are often used on fat tire electric bikes, or touring e-bikes.
Once you understand the basic principles behind mechanical and hydraulic disc brakes, it's easier to see why they might experience some common issues over time. While both systems can deliver effective braking power, various external factors—such as friction, temperature fluctuations, or improper maintenance—can cause performance degradation. In the next section, we'll dive into some of the most common issues that can arise in these systems, how to spot them early, and how to fix them to ensure safe and efficient riding.
Reasons for Reduced Brake Sensitivity in Mechanical Disc Brakes and Their Symptoms
1. Loose or Broken Brake Cables
Symptoms:
- Slow Brake Response: If the brake cables are loose or broken, the brake lever may feel unusually soft, making it hard for the brake pads to properly engage the rotor, reducing braking power.
- Lever Sinking: If the brake cable is too loose, the lever may sink when pulled, making the braking feel ineffective.
- Increased Gap Between Brake Pads and Rotor: A larger than usual gap between the brake pads and rotor can indicate that the brake cable is loose.
How to Detect:
- Check Cable Tension: Pull the brake lever gently. If it moves too smoothly with little resistance, the cable might be loose. You can also check the tension adjustment screw on the brake lever.
- Check for Cable Breaks: Inspect the brake cable for visible damage or wear. A broken cable can lead to unresponsive brakes.
How to Fix:
- Adjust Cable Tension: Use the tension adjustment screw on the brake lever to increase tension if the cable is too loose.
- Replace Broken Cable: If you find the cable is damaged or broken, you should replace it. A new cable will restore normal brake performance.
- Lubricate the Cable: Regularly lubricating the brake cable can reduce friction and prolong the life of the cable, ensuring smoother braking.
2. Excessive Brake Pad Wear
Symptoms:
- Weakened Braking Performance: Worn brake pads result in less contact area between the pads and rotor, weakening braking power.
- Increased Noise: Worn pads often create squealing or grinding noises, especially when making contact with the rotor.
- Reduced Pad Thickness: Brake pads thinner than 3mm should be replaced immediately.
How to Detect:
- Measure Brake Pad Thickness: Use calipers or a brake pad thickness tool to measure the pads. If they're thinner than 3mm, they need replacement.
- Inspect for Uneven Wear: Look for grooves or uneven wear patterns on the brake pads. These are signs that the pads are excessively worn.
How to Fix:
- Replace Brake Pads: When the pads reach their minimum thickness (around 3mm), replace them to ensure safe and effective braking.
- Check Alignment: After replacing pads, make sure they are properly aligned with the rotor to ensure even wear and optimal performance.
3. Warped Rotor
Symptoms:
- Vibration During Braking: A warped rotor causes uneven contact with the brake pads, leading to vibrations in the handlebars or brake lever when braking.
- Noise During Braking: Warped rotors can create noise like squeaking or grinding due to improper contact with the pads.
- Reduced Braking Power: Since the rotor is not flat, the braking power is reduced because the pads cannot engage the rotor evenly.
How to Detect:
- Inspect Rotor Flatness: Spin the wheel and visually check the rotor. If the rotor wobbles or moves unevenly, it is likely warped.
- Use Specialized Tools: A rotor truing tool can help assess the flatness of the rotor and correct slight warping.
How to Fix:
- True the Rotor: Use a rotor truing tool to straighten the warped rotor. If the warping is severe, the rotor might need to be replaced.
- Replace the Rotor: If truing doesn’t solve the issue, or if the rotor is too damaged, replacing the rotor is the best solution.
4. Accumulation of Dirt or Oil
Symptoms:
- Reduced Braking Performance: Dirt or oil on the brake pads or rotor reduces friction, weakening braking power.
- Noise During Braking: Contaminated pads and rotors can cause squealing, sliding, or other abnormal sounds when braking.
How to Detect:
- Inspect Brake Pads and Rotor: Check the brake pads and rotor for oil, dust, or dirt. These contaminants will be visible on the surface.
- Touch the Pads: If the pads feel oily or sticky, they are contaminated.
How to Fix:
- Clean the Brake System: Use a dedicated brake cleaner to clean the rotor and brake pads, removing any oil, dirt, or other contaminants.
- Replace Contaminated Pads: If cleaning doesn’t restore the brake pads to full functionality, replace them. Contaminated brake pads can’t always be cleaned effectively, and will need to be replaced to ensure proper braking.
- Regular Maintenance: Clean your brake system regularly to prevent the buildup of dirt or oil, which will help maintain optimal braking performance.
Reasons for Reduced Sensitivity in Hydraulic Disc Brakes and Their Symptoms
1. Hydraulic Fluid Leaks or Insufficient Fluid
Symptoms:
- Soft Brake Feel: When the hydraulic fluid is low or leaking, the brake lever may feel soft or unresponsive. You might have to pull the lever all the way to engage the brakes, or the brakes might not engage at all.
- Brakes Failing or Uneven Response: If the leak is significant, the brakes may fail completely or work inconsistently, especially after prolonged use.
How to Detect:
- Check Fluid Levels: Most hydraulic systems have a fluid window to check fluid levels. If the level is low, it's time to top it up.
- Inspect for Leaks: Look for oil spots or stains around the brake lines, calipers, or brake lever area. These are signs of leaks.
- Brake Lever Response: Pull the brake lever and see if it feels unusually soft or has excessive travel. This indicates a fluid shortage or leak.
How to Fix:
- Top Up Fluid: Refill the hydraulic fluid to the recommended level. Ensure you’re using the correct type of fluid specified by the manufacturer.
- Replace Leaky Parts: If you detect a leak, inspect the brake lines and calipers. Replace any damaged parts or seals to stop the leak.
-
Bleed the Brakes: After topping up the fluid, you may need to bleed the brakes to remove air from the hydraulic system and restore proper brake function.

2. Damaged Brake Lines or Air in the System
Symptoms:
- Loss of Brake Lever Feedback: Cracked or damaged brake lines can cause a loss of hydraulic pressure, making the brake lever feel soft and unresponsive.
- Vibration in the Brake Lever: Air in the hydraulic system can cause vibrations in the lever, which results in inconsistent braking performance.
- Uneven Braking: Air or damaged lines can cause uneven braking, where one side of the brake pads contacts the rotor earlier or later than the other side.
How to Detect:
- Check for Damage to Brake Lines: Inspect the brake lines for cracks, wear, or other visible damage. Any cracks may cause hydraulic fluid to leak.
- Check for Air in the System: Pull the brake lever. If it feels soft or spongy, there may be air in the system.
- Inspect Brake Line Connections: Ensure the brake line connections are tight and secure. Loose connections can cause fluid leakage or air entry.
How to Fix:
- Replace Damaged Brake Lines: If the brake lines are damaged, they should be replaced immediately to restore proper hydraulic pressure.
- Bleed the Brakes: If air is trapped in the system, you’ll need to bleed the brakes to remove the air. This process restores the correct hydraulic pressure and brake performance.
- Check for Leaks: Tighten any loose connections and replace any damaged fittings to prevent further fluid leakage.
3. Excessive Brake Pad Wear
Symptoms:
- Weakened Braking Performance: As the brake pads wear down, their ability to grip the rotor decreases, leading to weaker braking.
- Noise During Braking: Worn brake pads may produce high-pitched squeals or grinding sounds when they make contact with the rotor.
- Longer Stopping Distance: With thinner pads, the braking system will require more force and time to stop the bike.
How to Detect:
- Measure Brake Pad Thickness: Use calipers to measure the thickness of the brake pads. If they are thinner than 3mm, it’s time to replace them.
- Inspect Brake Pad Surface: Look for uneven wear or visible cracks on the pads. Pads with these issues should be replaced immediately.
How to Fix:
- Replace Brake Pads: If the pads are too thin (below 3mm) or excessively worn, replace them with new ones.
- Check Pad Alignment: Ensure the new pads are properly aligned with the rotor to ensure even wear and optimal braking performance.
4. Brake Caliper Issues
Symptoms:
- Caliper Sticking: Dirt or corrosion can cause the brake calipers to stick, preventing the brake pads from properly engaging with the rotor.
- Stiff Brake Lever: If the caliper is stuck, the brake lever may become hard to pull, or it may lack proper rebound feel.
- Uneven Contact Between Pads and Rotor: A stuck caliper can cause the brake pads to not make uniform contact with the rotor, leading to inconsistent braking.
How to Detect:
- Check for Sticking Calipers: Observe whether the brake calipers move freely. If they are stiff or not moving smoothly, the calipers may need maintenance.
- Check the Caliper Mounting Bolts: Ensure the calipers are securely mounted and not loose.
How to Fix:
- Clean the Calipers: If the calipers are sticky, clean them with a degreaser and ensure that they move freely.
- Lubricate the Calipers: Lubricating the moving parts of the caliper can help prevent sticking.
- Replace Sticking Calipers: If the caliper is damaged or excessively worn, replace it.
5. Rotor Wear or Warping
Symptoms:
- Noise During Braking: A worn or warped rotor may cause squeaking, scraping, or grinding noises, as the brake pads don’t make uniform contact with the rotor.
- Vibration in Brake Lever: If the rotor is warped, you may feel vibration or shaking in the brake lever due to uneven braking force.
- Decreased Braking Power: A warped rotor reduces the contact area between the pads and rotor, leading to reduced braking efficiency.
How to Detect:
- Inspect Rotor Surface: Look for scratches, dents, or visible warping on the rotor. A warped rotor may wobble when you spin the wheel.
- Check Rotor Trueness: Use a rotor truing tool to check whether the rotor is warped or bent.
How to Fix:
- True the Rotor: If the rotor is slightly warped, you can use a rotor truing tool to straighten it.
- Replace the Rotor: If the rotor is severely worn or damaged, replacing it is the best option to restore braking performance.
Maintenance Tips for Mechanical and Hydraulic Disc Brakes

Proper maintenance is essential for ensuring your brakes continue to perform at their best, whether you have mechanical or hydraulic disc brakes. Here are some maintenance tips for each system:
Mechanical Disc Brakes
-
Check and Adjust Cable Tension: Over time, the brake cables can stretch, affecting braking performance. Periodically check the tension of the cables and adjust them as needed to ensure optimal performance. Tightening or loosening the barrel adjusters near the brake lever or caliper will help you fine-tune the cable tension.
-
Inspect Brake Pads: Mechanical disc brake pads wear down with use, so it’s important to check them regularly. If they’re worn too thin (usually below 3mm), they should be replaced to ensure effective braking.
-
Clean and Lubricate the Cables: Dirt and debris can accumulate on the brake cables, causing them to stick or lose efficiency. Regularly clean the cables with a soft cloth and lubricate them with a light, non-greasy oil to ensure smooth operation.
-
Check Rotor Alignment: Mechanical disc brakes rely on the rotor being properly aligned with the brake pads. If the rotor becomes bent or misaligned, it can cause uneven braking. Use a rotor truing tool to straighten bent rotors if necessary.
Hydraulic Disc Brakes
-
Check Hydraulic Fluid Levels: Unlike mechanical brakes, hydraulic systems rely on brake fluid to function properly. Low fluid levels can lead to reduced braking power or a spongy feel in the brake lever. Regularly check the fluid levels and top them up if necessary. Make sure to use the correct type of fluid specified by the brake manufacturer (usually mineral oil or DOT fluid).
-
Bleed the Brakes: Air can enter the hydraulic brake system through small leaks or if the brake pads are replaced, leading to a spongy lever feel. To restore full braking power, you’ll need to “bleed” the system by removing the air bubbles. This process involves using a specialized kit to push brake fluid through the system and out the air bubbles. It’s important to follow the manufacturer's instructions carefully to avoid damaging the brake system.
-
Inspect Brake Pads and Rotors: Just like mechanical disc brakes, hydraulic brakes require regular inspection of the brake pads and rotors. Over time, the pads will wear down, and the rotors may develop grooves or other signs of damage. Replace the pads when they wear down to about 2mm in thickness, and check the rotors for warping or excessive wear. If the rotor surface is uneven, you may need to replace it or have it trued.
-
Clean and Lubricate the Calipers: Dirt, dust, and debris can affect the performance of the hydraulic brake calipers. Regularly clean the calipers with a mild cleaner and a soft brush, and ensure the caliper pistons move freely. Never lubricate the brake pads or rotor, as oil can drastically reduce braking performance.
Recommended Fiido E-Bikes
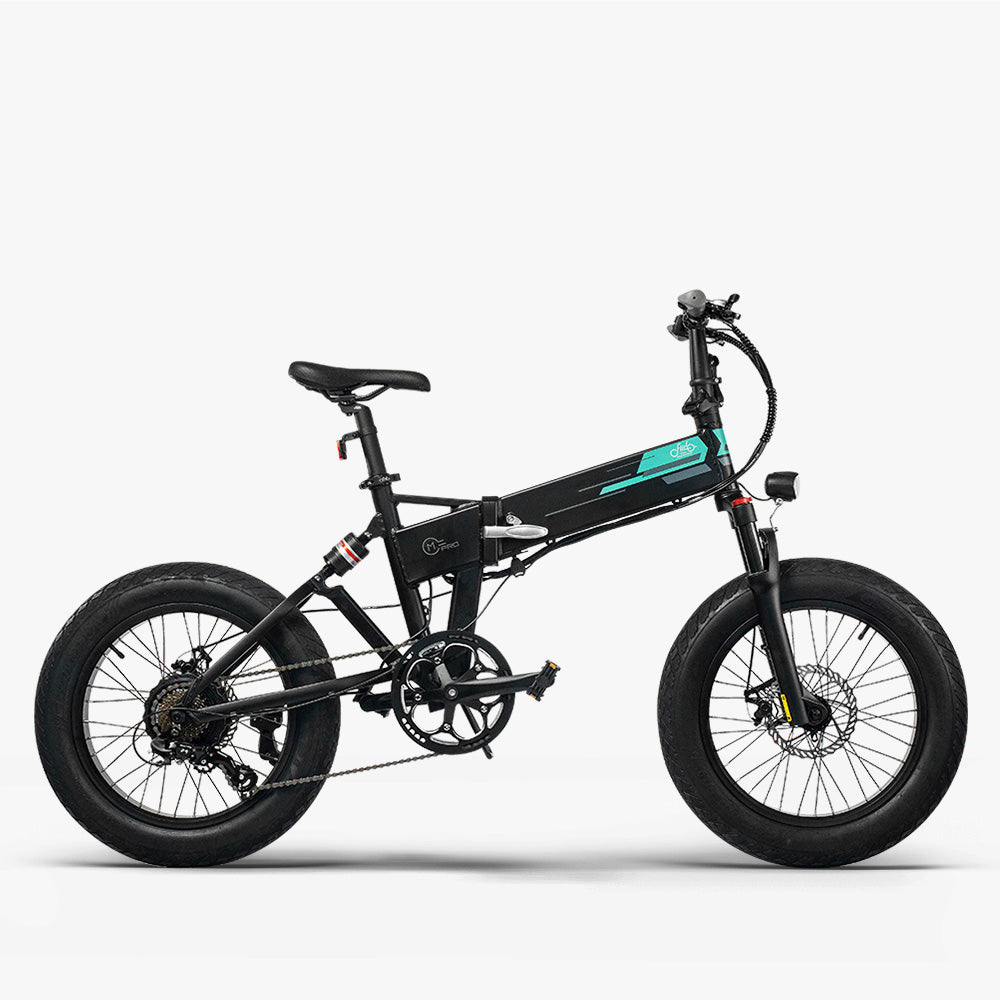
When choosing an e-bike, the braking system is a key consideration. The following two Fiido e-bike models are equipped with high-quality braking systems, ensuring rider safety and comfort:Fiido M1 Pro
As a powerful off-road e-bike, the Fiido M1 Pro off-road e-bike is equipped with hydraulic disc brakes, offering outstanding braking performance. Whether you're riding on urban roads or rugged trails, this e-bike ensures that riders can maintain full control of braking for safety.
Fiido M1 Pro Fat Tire Electric Bike
The most cost-effective fat tire ebike for off-road adventures.
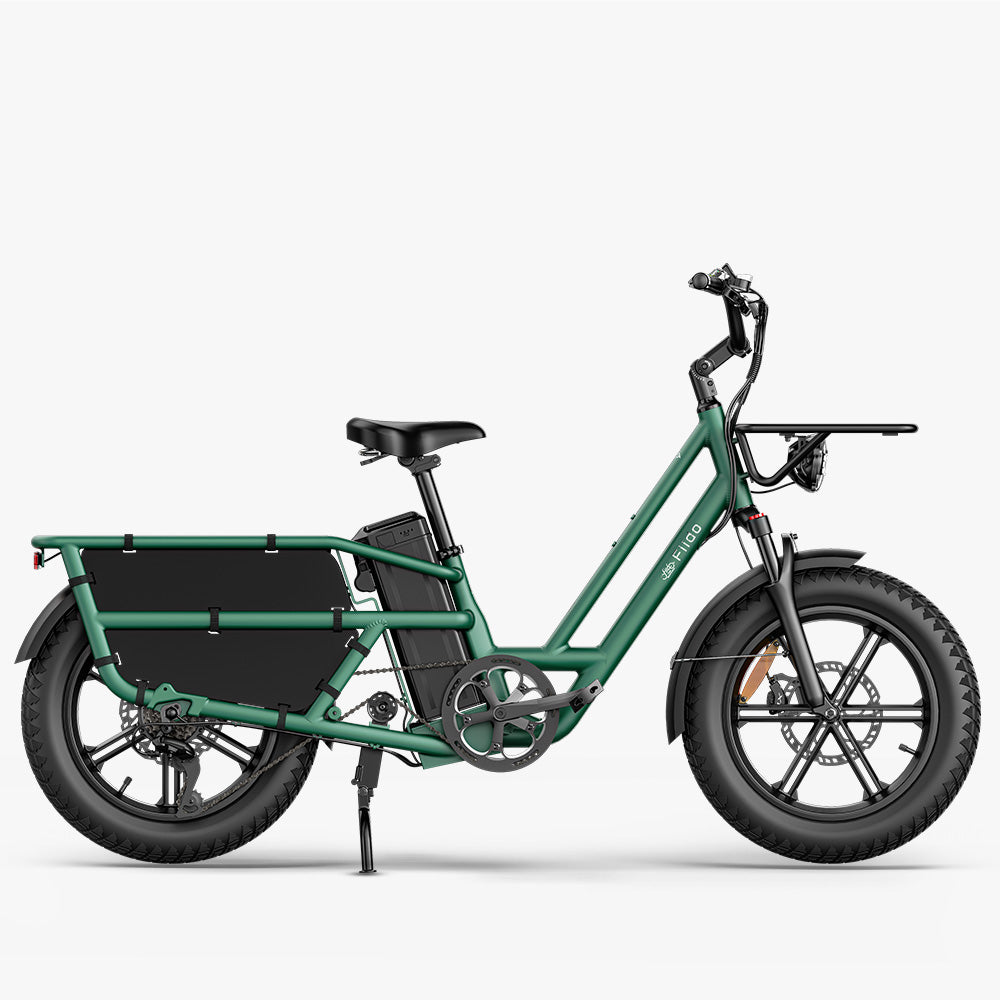
Fiido T2
The Fiido T2 fat tire electric bike is a long-range electric cargo bike equipped with mechanical disc brakes, providing reliable braking response. It is ideal for daily commuting and cargo use, offering excellent value and stability.
Fiido T2 Longtail Cargo E-bike
Multifunctional, family-friendly cargo ebike with endless possibilities.


